Components
The Components tab tracks all installed parts and assemblies on the aircraft, along with their service intervals and remaining life.
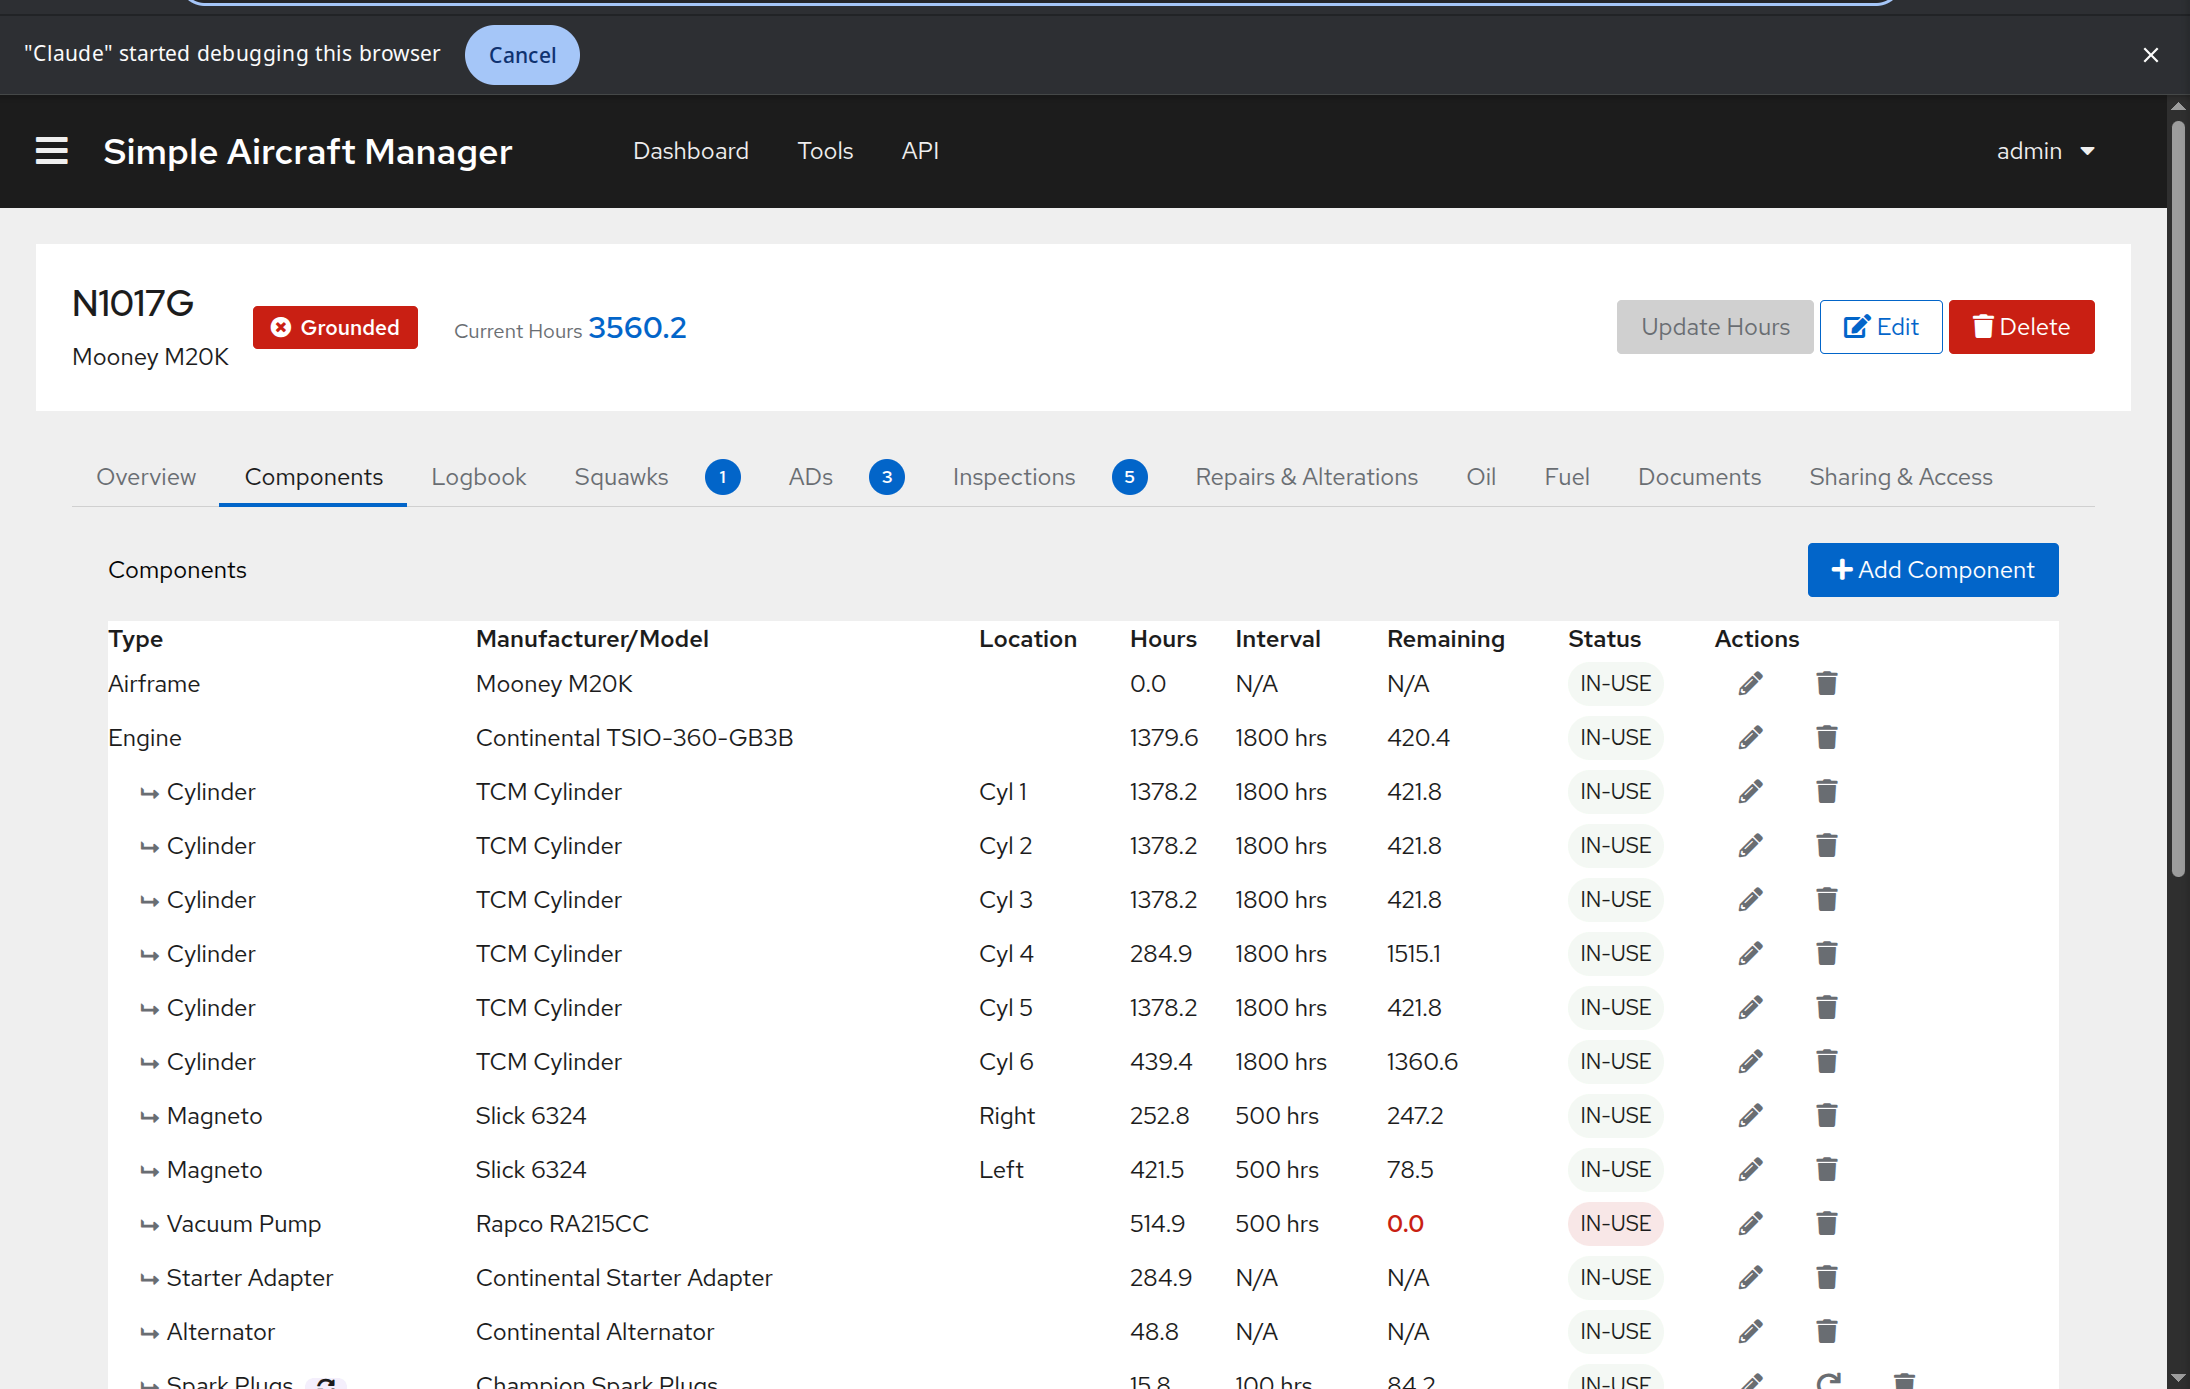
Component List
Components are displayed in a table with the following columns:
Type – The component type (e.g., Engine, Oil Filter, Propeller). Child components are indented under their parent to show hierarchy. Replacement-critical components show a purple sync icon.
Manufacturer/Model – The part manufacturer and model number.
In Service – Total cumulative hours since the component was installed. This counter is never reset by a routine service action; it only resets if you choose Replace during a service reset (see below).
Since OH/SVC – Hours since the last overhaul or last service reset, whichever is more recent. This is the counter used to calculate replacement and TBO intervals. It resets to zero after every service reset.
Remaining – Hours remaining until the next service action. Colour-coded as the interval approaches:
Green when well within limits.
Orange when within 10 hours of the limit.
Red when overdue.
Status – The component status (IN-USE, SPARE, DISPOSED, etc.).
Actions – Edit, reset service, or delete buttons (owners only).
Click the expand arrow on any row to see additional detail: serial number, notes, and a calendar-based remaining time for components with a day-based interval.
Adding a Component
Click Add Component in the top right.
Select a Component Type from the dropdown. If the type you need does not exist, ask an administrator to create it.
Fill in the component details:
Manufacturer and Model – The part manufacturer and model/part number.
Serial Number – Optional serial number for tracking.
Install Location – Where the part is installed.
Parent Component – Optional. Select a parent to create a hierarchy (e.g., an oil filter under an engine).
Status – Typically “IN-USE” for installed components.
Configure tracking mode(s). A component can use one or more of these independently:
Replacement Critical – For parts replaced on a schedule (oil, filters, spark plugs). Set the Replacement Hours interval and the current Hours Since Overhaul/SVC (how many hours are already on it since the last service). The airworthiness check flags the component when this counter reaches the interval.
TBO Critical – For parts with a Time Between Overhaul limit (engines, propellers). Set the TBO Hours and current Hours Since Overhaul. When TBO Tracking is enabled, an optional Maintained On-Condition checkbox appears (see below).
Inspection Critical – For parts requiring periodic inspections. Tracked via the Inspections system.
Click Save.
On-Condition (RCM) Maintenance
For complex components such as engines and propellers, many operators follow Reliability-Centered Maintenance (RCM) or on-condition philosophy: the risk of a maintenance-induced failure around an overhaul event can exceed the risk of simply continuing the component in service past its nominal TBO, provided the component is monitored and shows no signs of deterioration.
When TBO Tracking is enabled on a component, you can check Maintained On-Condition to reflect this operating decision.
Effect on the UI:
Condition |
Color shown |
|---|---|
Under 90 % of TBO |
Normal (no highlight) |
90–100 % of TBO |
Blue — approaching TBO reference point |
100–150 % of TBO |
Teal — operating past TBO on condition |
Over 150 % of TBO |
Green — running well past TBO on condition |
The component badge (IN-USE) changes from the normal red/orange warning to blue once the component passes TBO, and the On-Condition label appears in the component detail panel.
Note
On-Condition mode only suppresses TBO-based color warnings. If the component also has a Service Interval (Replacement Critical) configured, those service-interval warnings continue to use the standard red/orange alert colors regardless of this setting.
Resetting Service
When you service or replace a consumable part, click the reset button (circular arrow icon) in the Actions column. This button only appears for replacement-critical components with status “IN-USE”.
A modal will appear asking how the service was performed:
Option |
What it does |
|---|---|
Service in place |
Resets Since OH/SVC hours to zero and updates the service date to today. Use this when the component was inspected, adjusted, or cleaned without being physically removed and replaced (e.g. spark plug gap check, filter inspection). |
Replace |
Resets Since OH/SVC hours and In Service hours to zero, and updates both dates to today. Use this when a new unit was installed (e.g. oil change with a new filter, new spark plugs). |
Both options reset the Since OH/SVC counter so that the next service interval counts from today. The difference is whether the total-time-in-service counter (In Service) also resets – choose Replace any time a new part goes in.
Editing and Deleting
Click the pencil icon to edit a component’s details.
Click the trash icon to delete a component. This action cannot be undone.
Component Hierarchy
Components can be organized in a parent-child hierarchy. For example:
Engine (Lycoming O-360)
  ├── Oil Filter
  ├── Spark Plugs (Top)
  └── Spark Plugs (Bottom)
Child components are visually indented in the table with an arrow indicator. When you set a parent component, the child appears nested beneath it.